Subscription: Start, Smart, and Pro
Role: All
The Tripletex integration offers the following functionality:
Synchronization* of:
- Customers
- Projects
- Employees
*Synchronization means that you can create and modify an object in one system, and it gets updated in the other.
Sending of:
- Hours from Svenn to Tripletex
However, when you want to seamlessly connect two systems, it requires a bit of setup before getting started.
Basic Setup
The first thing to do before activating the integration is to ensure that the IDs in the systems match each other. This is done to ensure that the information in Svenn is linked with the same information in Tripletex, avoiding information overwrites or duplicates.
We recommend starting with employees, followed by customers, and then projects.
Employee ID
This is crucial for the integration to work seamlessly and MUST be reviewed before activating the integration.
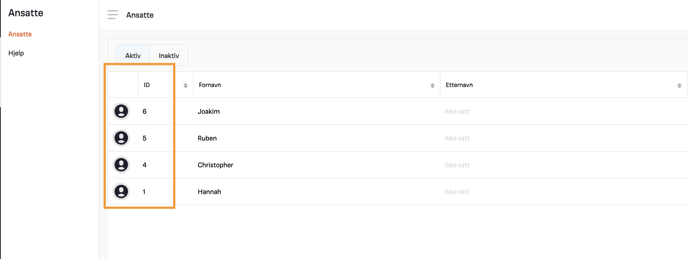
In Svenn, you can find the Employee ID by selecting "Employees" from the menu on the left. In front of each employee in the list, there is a number, which is the Employee ID.
In Tripletex, you can find the same number by selecting "Company" and then "Employees." The number in front of the employee's name is the ID or employee number in Tripletex. 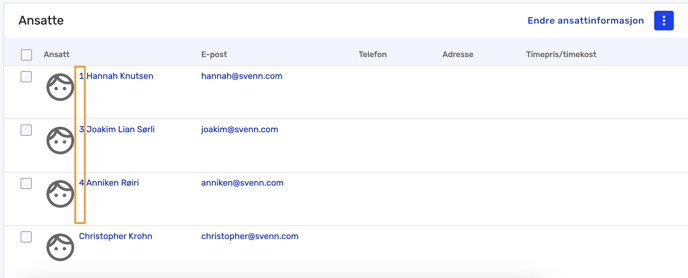
It doesn't matter whether you choose to change the ID in Tripletex or Svenn; the key is that the IDs match.
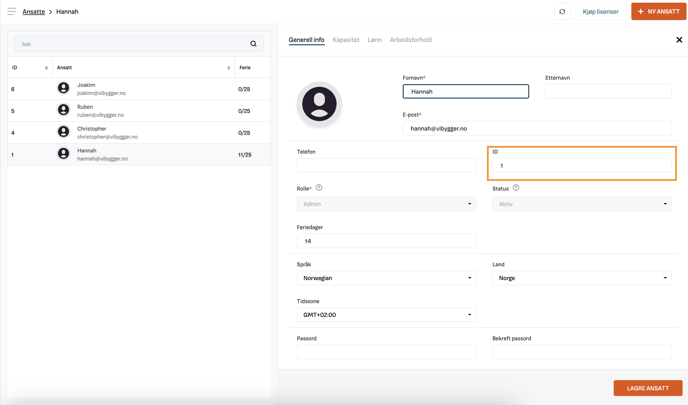
To change the ID in Svenn, click on the employee, enter the same number as the employee has in Tripletex, and click save. This must be done for all employees.
In Tripletex, change the employee number by selecting the employee and then "Employment."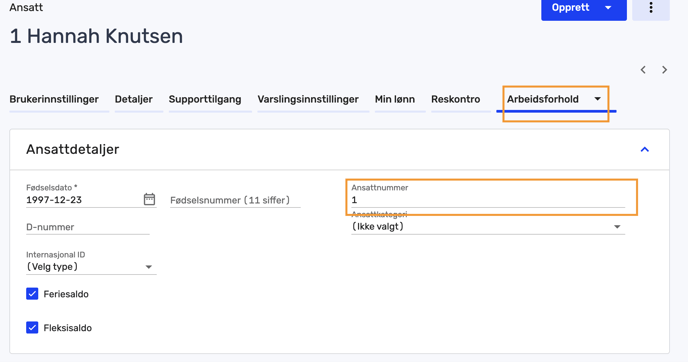
If the employee does not have an ID in Tripletex, we recommend entering the same ID as in Svenn. If the employee does not have a user in Svenn, the employee will be automatically created with an available ID number when the integration is turned on.
Customer ID
The next step is to ensure that the customer IDs in Svenn and Tripletex match.
If you have just become a customer of Svenn and your customer list is empty, you can skip this step.
Note: When creating an account in Svenn, there will always be an example customer automatically included; this may need to be deleted.
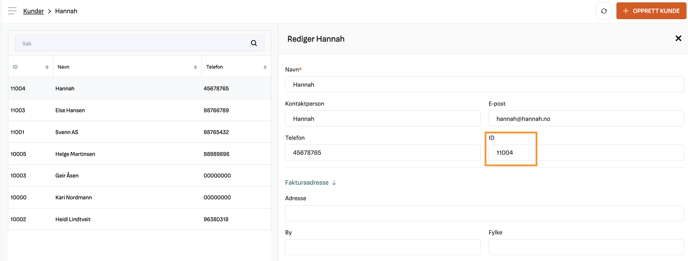
You can find your customers by selecting "Customers" from the left menu in Svenn. The number in front of each customer is the customer ID.
To change the ID, click on the customer, navigate to the field labeled ID, enter the same number as in Tripletex, and click save.
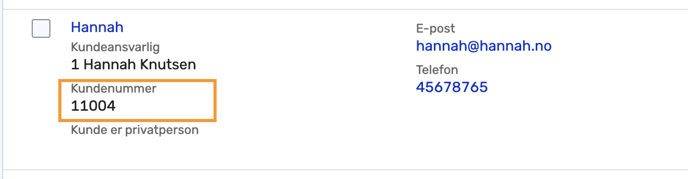
In Tripletex, find the customer ID by selecting "Customers" and then "Customers/Suppliers." You can change the customer number by clicking on the customer and navigating to the customer number field.
Project ID
Finally, we need to ensure that the projects in Svenn and Tripletex have the same project ID.
If you have just become a customer of Svenn and your project list is empty, you can skip this step.
Note: When creating an account in Svenn, there will always be an example project automatically included; this may need to be deleted.
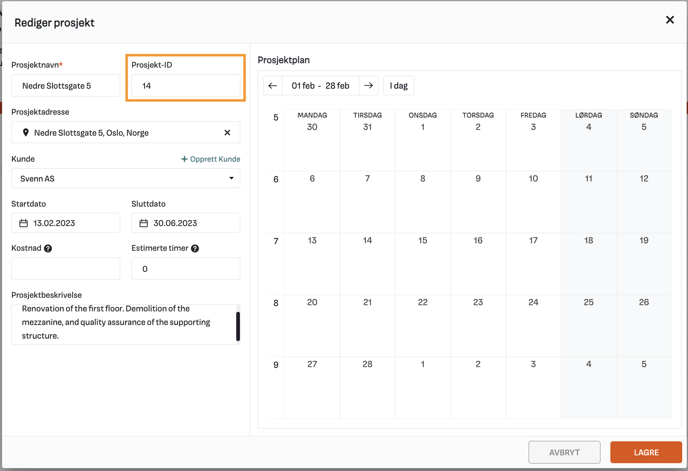
Find your projects by selecting "Projects" from the left menu in Svenn. The number in front of each project is the project ID.
To change the ID, click on the project, edit the project at the top right corner. Then navigate to the project ID field, enter the same number as in Tripletex, and click save.
In Tripletex, find the project ID by selecting "Projects" and then "Projects." You can change the project number by clicking on the project, navigating to details in the top menu, and then the number field.
Once the IDs for employees, customers, and projects have been reviewed, we are one step closer to turning on the integration and running the first synchronization.
Sending Hours from Svenn to Tripletex
If you wish to record hours in Svenn and then transfer them to Tripletex for payroll and invoicing, there are a couple of additional steps that need to be in place before we can activate the integration.
Setup in Tripletex
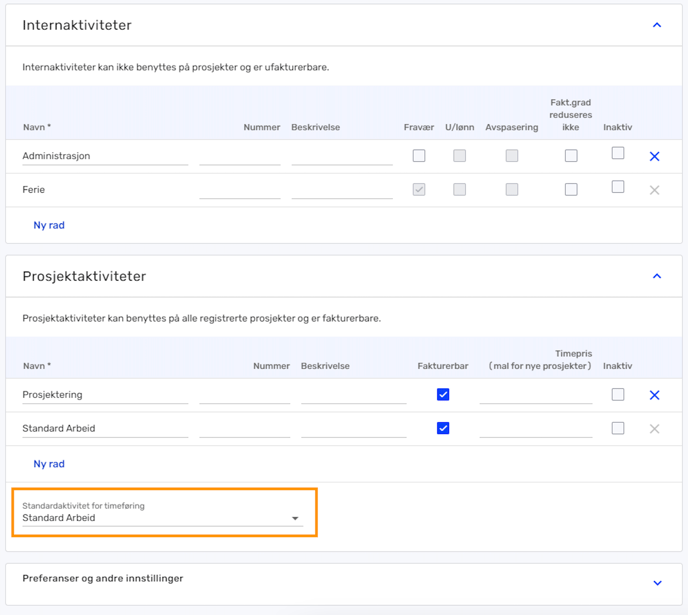
For Svenn to send hours to Tripletex, it's crucial that Project Activities are set up, and Standard Activity is configured in Tripletex. Svenn defaults to the standard activity when transferring hours to Tripletex if no tasks are assigned to the hours.
If you're unsure how to set this up in Tripletex, you can click here.
ince Svenn doesn't have the exact same setup as Tripletex, the following conversions in data flow between the systems have been made:
| Svenn | Tripletex |
| Tasks | Project Activities |
| Work types | Internal Activities |
Setup in Svenn
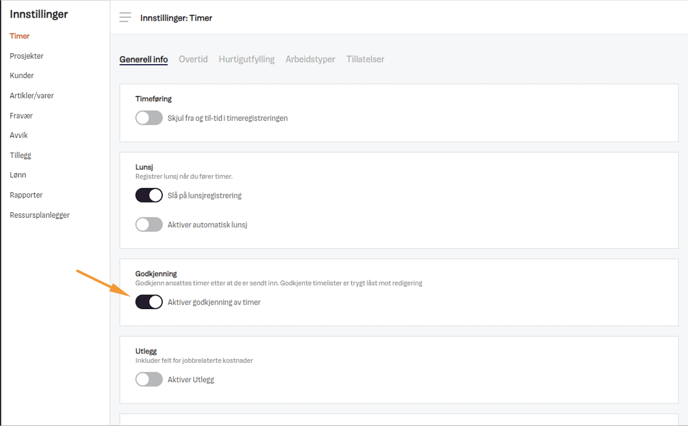
We only send approved hours to Tripletex. So if you haven't enabled hour approval, do so under the hour settings.
Project activities and any internal activities created in Tripletex will not be automatically synchronized to Svenn and must be created manually.
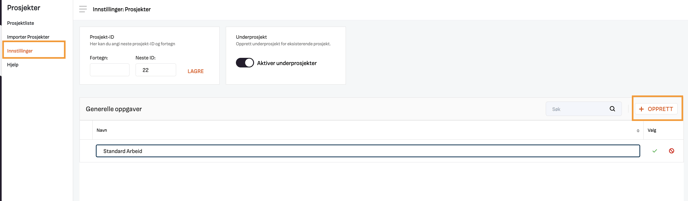
As mentioned earlier, project activities in Tripletex are equivalent to tasks in Svenn. Tasks are created by selecting "Projects" and then "Settings." Here, you can create general tasks by clicking the create button, entering the activity, and pressing enter.
Note: It's important that the task is written in the same way as the project activity in Tripletex so that they are linked.
If you also use internal activities in Tripletex, these can be created as work types in Svenn. You create a work type by clicking on hours and then settings. In the top menu, choose work types. These are created in the same way as tasks by clicking the create button, entering the activity, and pressing enter.